

From Trailer to Boutique: Converting a Cargo Trailer into the Equestrian Lifestyle Mobile Store
For years, I’ve packed up totes full of Equestrian Lifestyle hoodies and t-shirts and hauled them to shows. My setup always included gridwalls and tables, which meant a lot of work: loading everything into the vehicle, unpacking, hanging, arranging… and then doing it all over again at the end of the day. Once home, I’d unpack again, store the gridwalls, tables, and bins in the basement—only to repeat the cycle at the next event.
It didn’t take long before I started asking myself: there has to be an easier way.
That’s when the idea for a mobile store was born. Instead of hauling and setting up from scratch each time, I wanted everything to be self-contained, organized, and ready to roll.
I found the perfect starting point: a cargo trailer that had once been used as a small retail setup. It was wide, tall, and already wired for electricity—ideal for lighting and displays. The bones were there; it just needed a full interior makeover to transform it into the Equestrian Lifestyle mobile shop.

The first challenge I faced? All the red tape the previous owner had used to hang signs inside the trailer. At first, I thought, “It’s just tape—how hard can it be to remove?” Ha! Famous last words.
They don’t call it permanent tape for nothing. It turned into an absolute nightmare. I peeled, I scraped, I scrubbed. I tried Goo Gone, which worked… but also left behind a greasy stain that wouldn’t come off. The only way to deal with it (I tried several other methods) was to reapply Goo Gone to re-activate the residue, then scrub all over again. I repeated this process more times than I’d like to admit.
In the end, I was left with a few stubborn remnants of tape, some Goo Gone marks, and even a few scraped spots where the paint came off. Not perfect, but good enough to move forward. Honestly, if I had known just how bad that tape would be to remove, I might have thought twice about buying this trailer in the first place—it was that bad.

The first real step in the renovation was removing the cabinetry that was still inside the trailer. While the cabinets had served the previous owner’s purpose, they didn’t fit the vision I had for a mobile store.
The flooring looked great at first glance, but there was a catch—it had been cut to fit around the cabinetry. Once the cabinets came out, the flooring no longer made sense. As much as I liked it, the only option was to pull it all up and start fresh.
With the cabinets and flooring gone, I finally had a blank canvas to start planning the store layout—a clean slate where the real transformation could begin..

The trailer walls had a few small holes left from where things had been attached before, but overall they were in good shape. For the flooring, I weighed a lot of options—click flooring, vinyl, even painting faux planks. In the end, I decided to keep it simple and practical: I painted the floor a rich brown and added fresh white paint along the bottom portion of the walls to tie everything together with the existing white upper walls.
Sometimes the simplest solution really is the best, and the paint instantly gave the space a cleaner, brighter look—without the extra expense or hassle of installing new flooring.

The next step was figuring out how to hang the clothing. I knew I didn’t want to use gridwall—it felt too industrial for the look I was going for. Slatwall was another option, but the cost was higher than I wanted to invest.
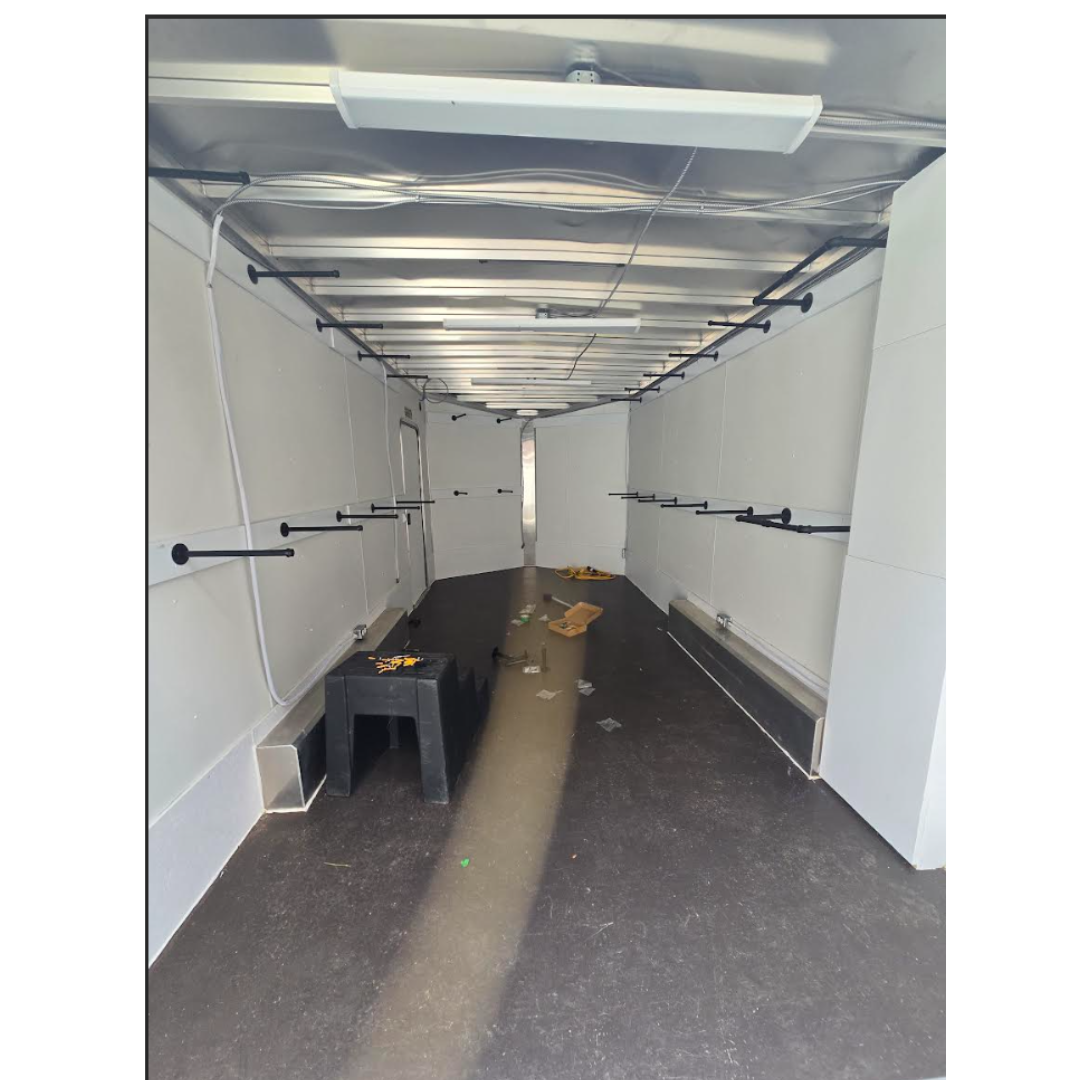
Instead, I came up with a more budget-friendly and clean solution: I installed wooden planks along the trailer walls, securing them to the trailers interior metal posts, and then attached pipe faceouts to display the clothing. At first, I painted the planks brown to match the floor, but quickly realized that white looked much better. The lighter color blended seamlessly with the walls instead of creating a sharp contrast, giving the shop a brighter, more polished feel.
To keep things neat and functional, I also covered the exposed metal wires with white split-sleeve protectors. Not only did this make them less noticeable, but it also solved a practical concern—the wires were a little grimy, and I didn’t want them touching the clothing.
Lastly, I built a wooden cabinet around the fuse box and cables. It keeps everything looking tidy and streamlined while still being easy to access if needed.
The painted floor was grimy, and no amount of scrubbing made it look appealing. I considered creating a faux plank floor finish for a more rustic feel, and I may still do that in the future. For now, though, I chose a more practical solution: marine carpet.
I installed the carpet across the entire trailer floor and extended it onto the ramp as well. While it does collect dirt, it’s easy to vacuum between events, which makes upkeep simple and quick.
To finish the flooring, I also added a slider plate where the trailer door meets the floor. This eliminated the gap that could have been a tripping hazard and gave the entrance a smoother, more polished transition.
To finish off the interior, I put together a simple checkout counter using scraps from the original cabinetry and other materials we had on hand. It’s functional, with a central shelf for bags and supplies plus an under-counter cash drawer. The front is still a blank canvas—it definitely needs a logo or some branding to tie it into the rest of the shop. I also realized the hat display area needs some rethinking to make better use of the space.
For accessories, I got creative and used a pipe ladder for a bunk bed as a display rack for the Equestrian snaffle bit belts. It fits the rustic-industrial look while being practical and affordable.
At the back of the trailer, my long-term vision is to install a wall with Dutch doors. This would allow me to close off the space if needed and even make it possible to add a mini-split system for heating and cooling. For now, I used a gridwall panel as a temporary solution to mimic the look and function of that future wall.
Currently, customers enter through the back, but I may eventually open the front door as well to improve flow. At the first show, the heat was intense, so I set up a fan at the door to keep air moving and make the space more comfortable.
And of course, the outside of the trailer is still a work in progress. Exterior branding and graphics are on my list for next year—a big step that will really help the trailer stand out and reflect the Equestrian Lifestyle brand. Here are my ideas:
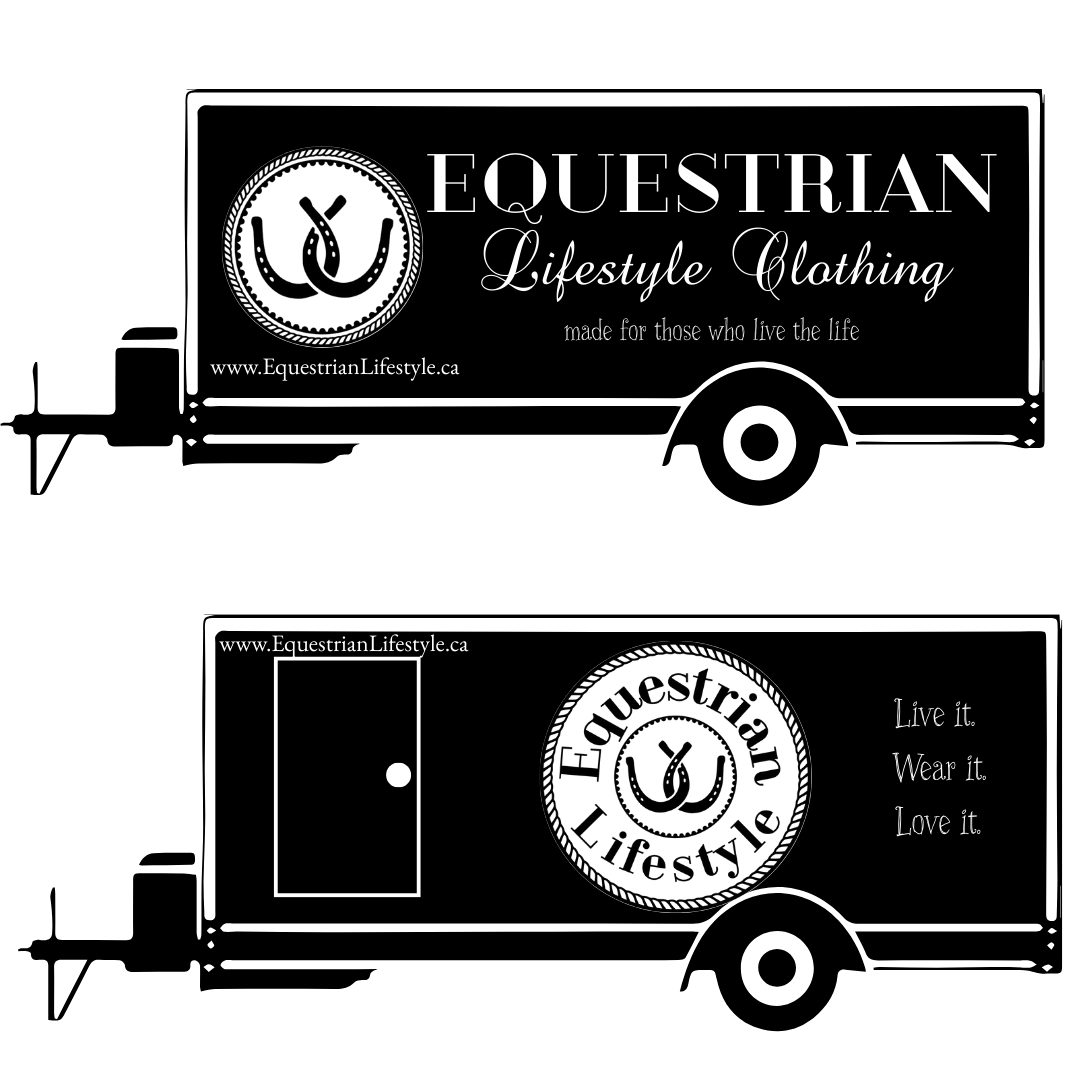

Back Ramp Door
This mobile shop is just the beginning, and I’m excited to keep refining it with new displays, exterior branding, and maybe even heating and cooling in the future.
✨ If you’d like to have Equestrian Lifestyle at your show or event, reach out—I’d love to bring the mobile store to you!